ScalePrint Utility
ScalePrint is a simple utility for printing picture files to a specified scale or size. It is included free with all RailDriver® Cyclopedias to print the useful and detailed high-resolution pictures contained on the CDs. It was originally designed for model railroading, but can print any normal picture file to a certain size on one or more pages.
Order the ScalePrint Electronic Delivery on our P.I. Engineering Website
Please include a valid E-mail address with your order. When your order is processed, we will contact you with directions for downloading and your key to unlock and install the program.
![]() Looking for ScalePrint on a Mac? Try Scale-n-Print from Lucky-bytes GmbH.
Looking for ScalePrint on a Mac? Try Scale-n-Print from Lucky-bytes GmbH.
ScalePrint Utility Tutorial
Install the program on a computer with a Windows operating system, then go to the 'ScalePrint' folder on the CD and click on the 'ScalePrint Setup.exe' file. If you downloaded the file, then please locate the setup file where it was downloaded.
After running the setup file, you will find the program under the 'ScalePrint' folder in your start menu.
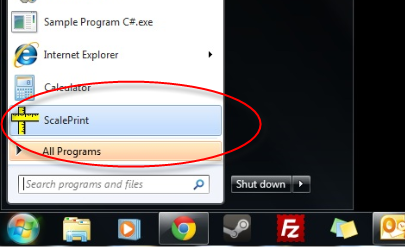
Run the ScalePrint Utility by clicking the 'ScalePrint' program, it will then come up with a blank screen. Go to the 'File' menu and select 'Open.' A dialog box will appear. Navigate the dialog box to your CD drive with the RailDriver Cyclopedia or other source of picture files.

Then select the picture you would like to print.
In the RailDriver Cyclopedias, the picture files (extension ".jpg") are all under the 'Cyclopedia / Pages' folder. The name of the file corresponds to the page number and the dash indicates the picture number on that page. Note the file name shows up in the 'File' name window of the ScalePrint screen.
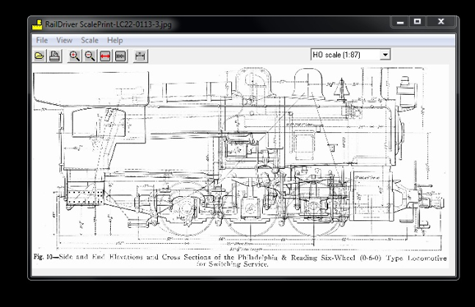
Once the picture is loaded, it will appear fit to the screen. To print the picture to scale, the real world size of the picture must be set. Picture files are various sizes and scales. Setting the real world scale allows the program to print the picture at a specific scale relative to the real world scale. This is easily done with ScalePrint by setting two points on the picture and defining the real world distance for the line between these two points.
We've selected a locomotive line drawing for this example (LC22-0113-3.jpg). This picture is one of the many highly-detailed drawings available on the CDs and has many dimensions already clearly labeled.
To set the two scaling points, first zoom into an object of known size. On this line drawing it is very easy as there are many dimensioned parts. On a photographic image that does not contain dimensions, you must zoom to an object where you know the size from external sources. For the greatest accuracy, select the longest known distance. Missing a 60" dimension by 1/2" will give you ten times the accuracy of missing a 6" dimension by 1/2".
The driver wheels of locomotives are almost always listed as a basic specification, and usually it is easy to zoom to the driver wheel and scale on that. For this line drawing we will use the driver wheel even though there are many objects of known size.
To zoom in and out, use the magnifying glass icons, the 'View' menu, or the keyboard hot keys F5 and F6. For best accuracy, zoom and use the scroll bars to keep the object of interest in view until the object fills most of the screen.

The scaling can be done at any zoom level, but it is easier to accurately place the cursor when the object used to scale takes up most of the screen.
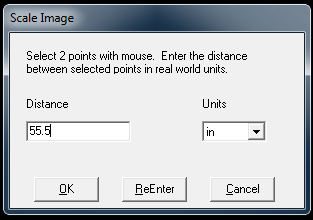
In the above picture we can clearly see that the driver is 55.5 inches across the dimension line shown. This is a perfect place to set the real world scale of the drawing. Now, select the scale icon or select 'Scale' from the 'Scale' drop-down menu. A dialog box will then appear. Enter the distance in the 'Distance' text box. If the distance is not in inches, change the unit of measurement with the 'Units' drop-down menu. In this case we will use 55.5 inches. This distance must be a decimal so ½ is .5.
Next, you'll want to move the dialog box out of the way so that you can select two points on the picture.
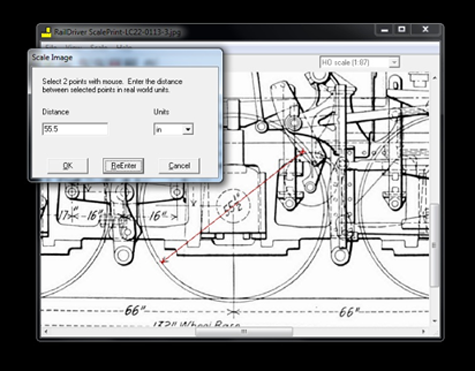
Using the mouse cursor, which will appear as a small cross, set the first point on one side of the wheel, at the end of the dimension arrow. Set a second point at the other side of the wheel at the other end of the dimension arrow. A temporary line will appear between the two points. If it looks like the line is in the right place, select 'OK' on the 'Scale Image' dialog box. If you would like to place the points more accurately, click the 'ReEnter' button and set two new points.
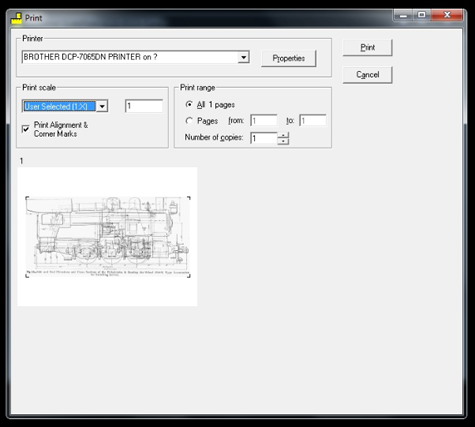
Now that the real world picture scale is set it may be printed. The 'Print' will start the 'Print' dialog box. From this box the printer can be selected and the output scale can be selected and changed. The default scale is HO scale. In this example, the drawing printed at HO scale will fit on one 8½" by 11" sheet of paper.
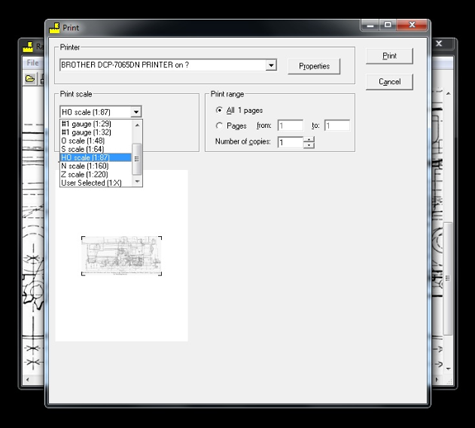
The screen will preview how the drawing prints at the selected print scale. If you like HO scale, simply click the 'Print' button. If you would like another scale, select one from the list, or select 'User Selected' at the bottom of the list.
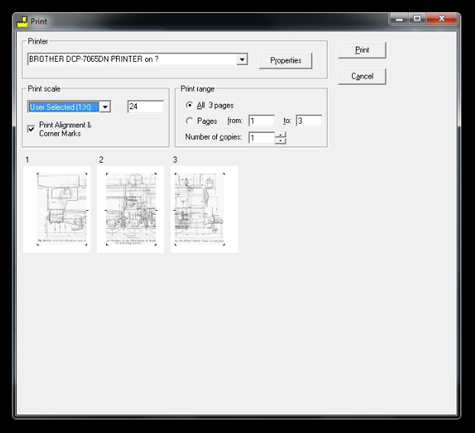
A small text box will appear next to the drop-down list. Enter the scale ratio number in this box. If you want 1/24 scale, enter 24 in this box. Then click the 'Update Preview' button. The picture will be tiled over three pages at this scale. The orientation of the page is automatically set to minimize the number of pages needed.
This screen is a good place to see whether or not you have set up the original scale correctly. If you get a small 0-4-0 switch engine tiled over four pages in HO scale, there is something wrong. Click the 'Cancel' button and rescale the original picture correctly.
Click on 'Print' to print all three pages or select 'Pages' and enter the range of pages to print. The number of copies to be printed may also be selected here.
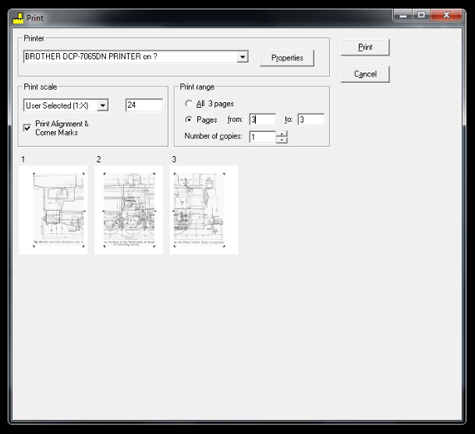
If we only want to print the front part of the engine, the print range would be from three to three. If you click the 'Print' button with the dialog set up this way, only the third page will print.
Printing Without a Specific Model Scale
To use this program to print a picture at a certain size — but not a scale — is also very easy. Instead of scaling the picture to a real world size, scale to the size of the paper you want to print on and set the 'User Selected' print scale to 1 to 1.
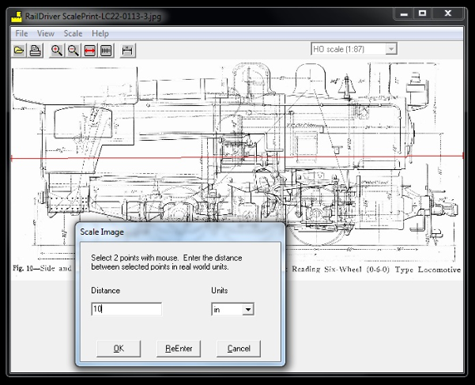
In this example, we selected both ends of the picture and set the distance to 10". A standard sheet of paper is 11" high and has ½" margins, leaving 10" for printing. By scaling the picture this way, the drawing will fit on one page in landscape layout.
Similar logic will allow you to tile the picture over two or more sheets to make easy to read 'blueprints' or a picture for the work shop wall. You may have to go back and re-scale the picture a few times while trying to get it to fit exactly how you want. Use the preview screen to ensure the page layout is correct before you print.
We created this program to print pictures from our RailDriver Cyclopedias, but it has many other uses, including printing pictures from the web, a digital camera, or other sources to the scale or size of your choice. By using the preview screen you can try different scales and sizes to see how they will fit on the paper before printing.