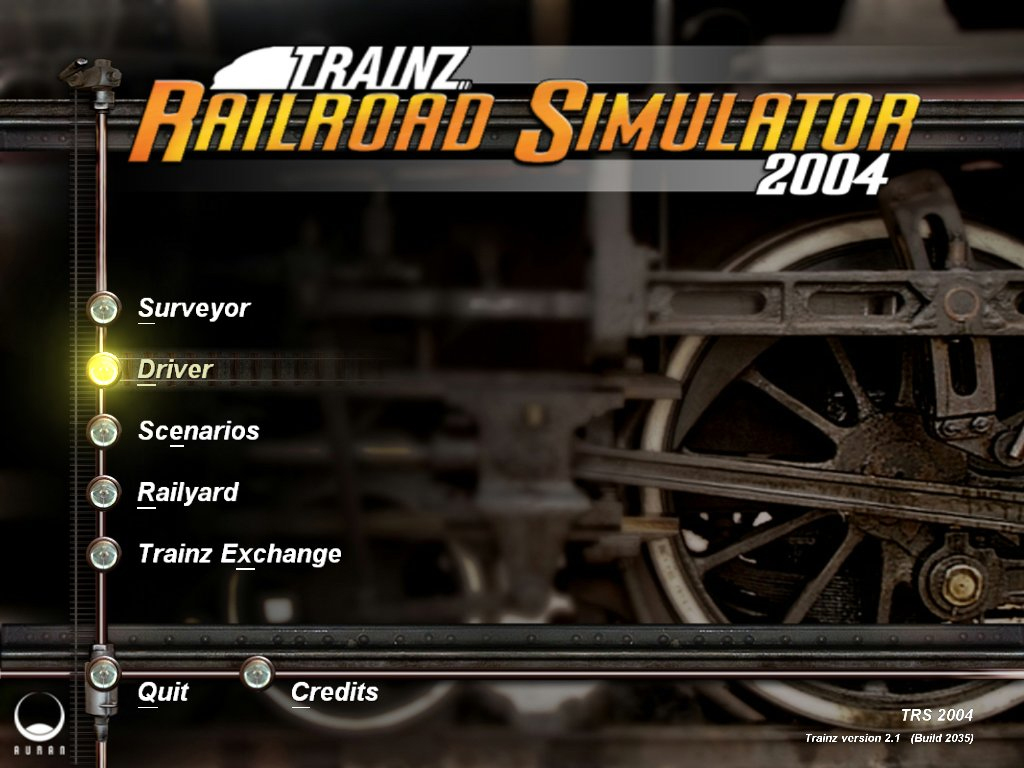
Trainz 2004 Tutorial
Introduction
This article will help you run a train in Auran Trainz Railroad Simulator 2004 (TRS 2004). Please note that while this article makes reference to the 'Michigan Lakes' route, the methods used can apply to any route in TRS 2004.
TRS 2004 uses different methods of placing and running trains than Trainz Ultimate Collection (UTC). Instead of making consists (trains) and placing them by clicking track marks on a map, we can now place the trains using 'Surveyor,' which is similar to MSTS Route Editor. A driver is automatically assigned to the first 7 locomotives in the route. You can place loose consists and individual cars anywhere on your layout.
Once you establish a routine in placing trains running, the rest of the game will be fairly straightforward.

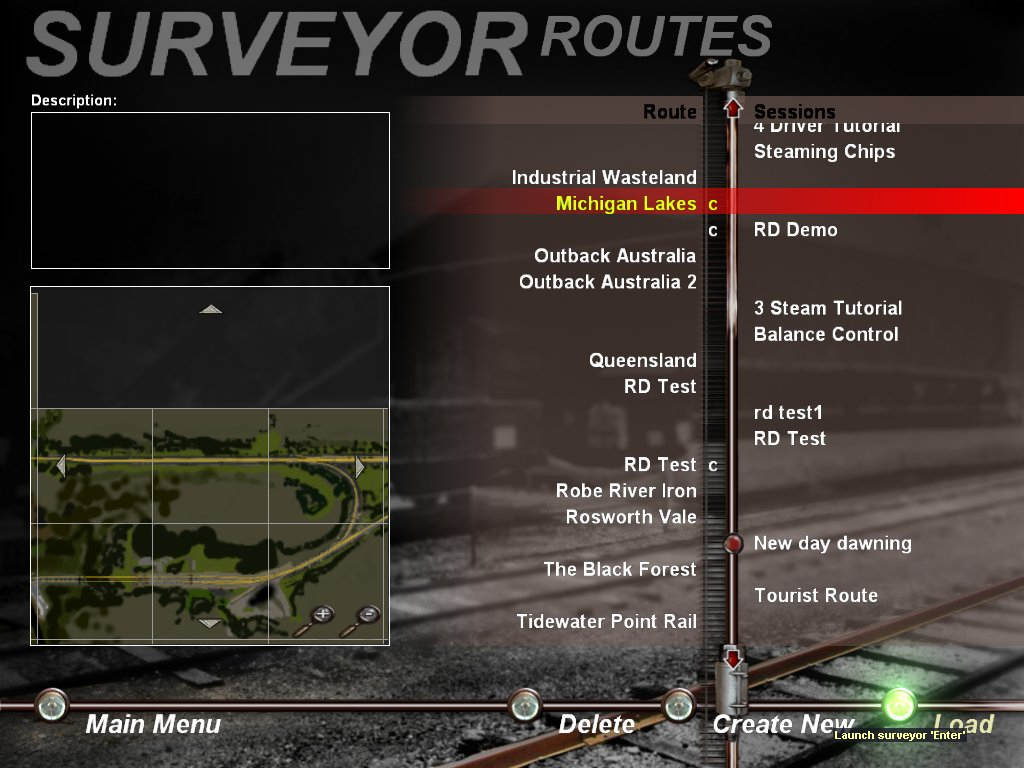
Launch TRS 2004
- Click on the 'Surveyor.'
- Select a route from the list.
- To the right of each route is a list of 'sessions' to choose from.
- Select 'Michigan Lakes' and then click on the 'Load' button to begin.
Please note that if we wanted to launch a 'session,' we would select the session and not the route before launching.
Getting Around
Once your chosen route has loaded, you will be presented with a view of the route with a green glowing cursor or 'compass' at the center of the image. The compass allows us to navigate around the route. I personally use it for following the track, although there are other methods of jumping around the route.
The compass in TRS 2004 can be moved by clicking on it and then dragging with the right mouse button, which is something that can take a little bit of getting used to at first.
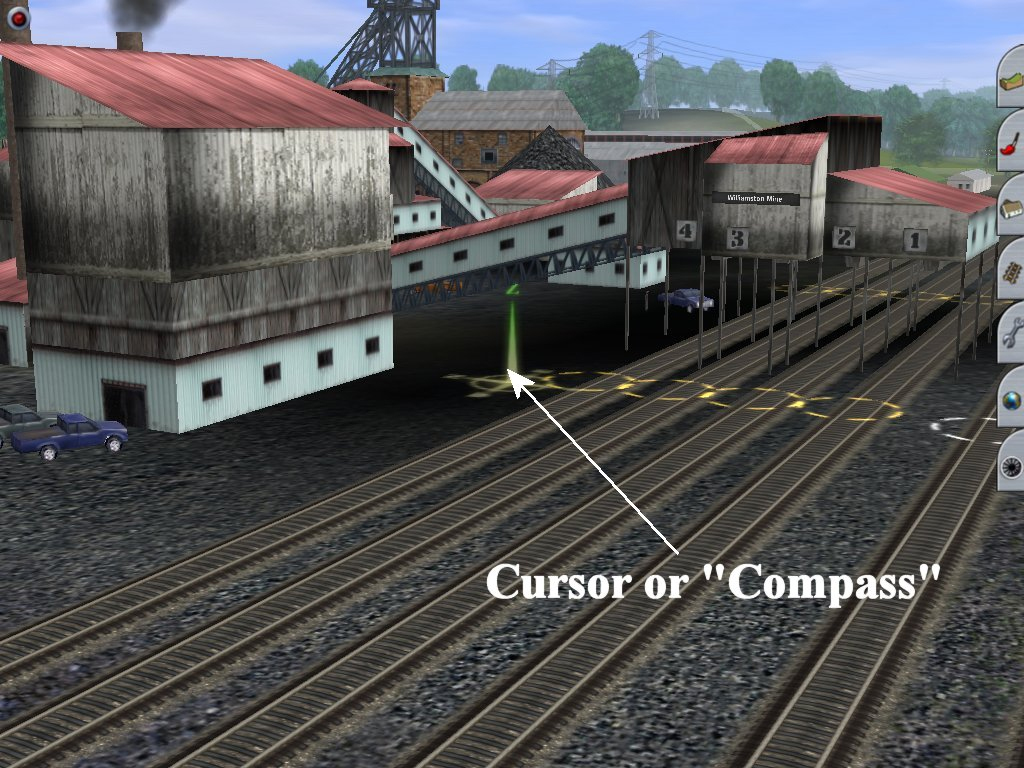
The speed can be adjusted using the menu options, which are found under the 'Surveyor Menu' at the top left of the page. Another trick is to zoom out and move the compass. If you have a mouse with a scrolling wheel, scrolling back will zoom out and scrolling forward will zoom in. If your mouse lacks a scrolling wheel, you can zoom in and out using the 'Page Up' and 'Page Down' keys on your keyboard.
The tabs with icons along the right side of the screen relate to different functions in 'Surveyor.' For this exercise, we are only interested in the bottom tab: the 'Trains' menu. You can open the menu by clicking on it, or by pressing the 'F7' key on your keyboard.
Placing Trains
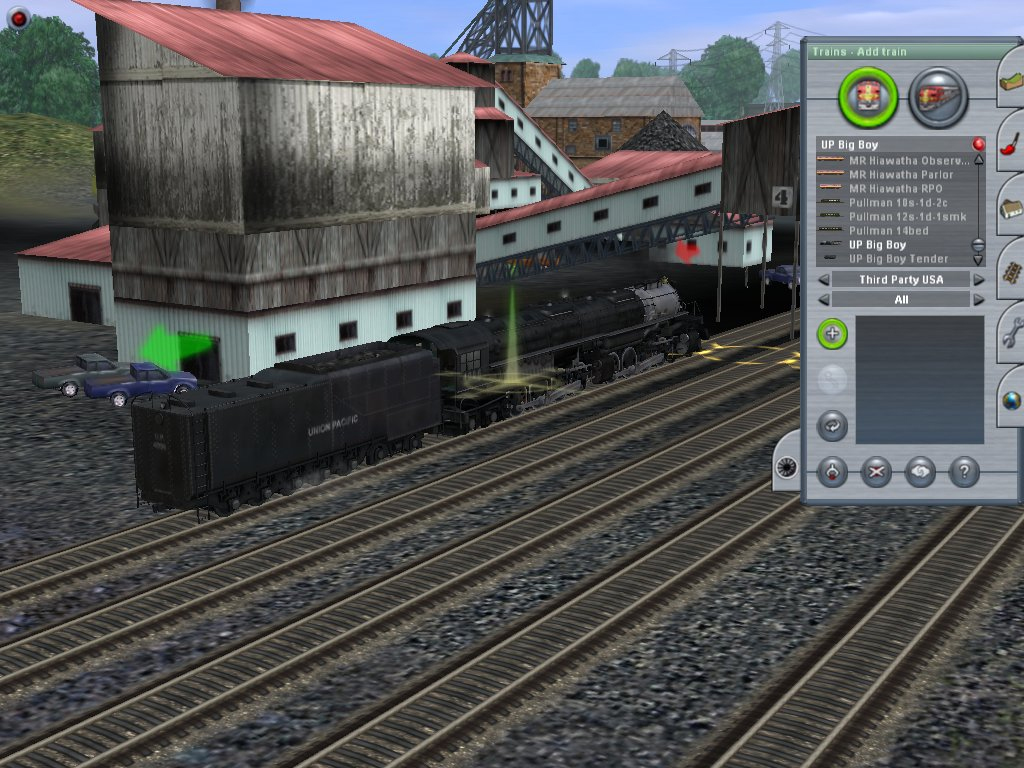
- Open the 'Trains' menu.
- There will be two buttons that are located at the top of the 'Trains' menu window.
- Of these buttons, the left is the 'Trains' button and the right is the 'Consists' button.
- Click on the 'Trains' button.
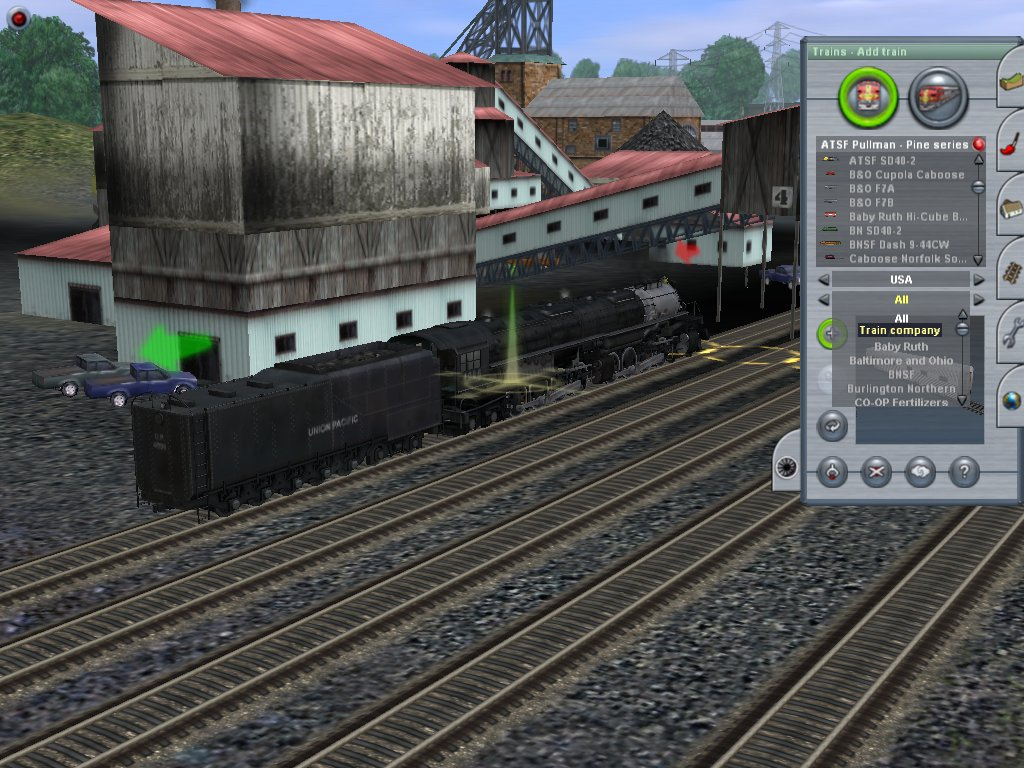
A list of available trains will appear in the window. We can narrow the list down by using the arrow buttons to the left and right of the text boxes below the list. The top box lists the region (or country) and the bottom box lists the company. Clicking on either box with the left mouse button will open a drop-down menu that makes the trains easier to find.
You may wish to practice using this feature until you feel comfortable finding a train in the various regions and railroads. Here, we will be making a coal train with the Big Boy. Select 'Third Party USA' in the region box, then 'All' or 'UP' in the railroad box.

In the lower half of the box, you will see a '+' sign highlighted in green. This is the current function you have selected. If you hold the mouse over any buttons or selectable options in TRS 2004, a label will show describing its specific function. When you select a particular train, it will show a small thumbnail window in the lower part of the menu. While not always true on slow machines, as long as the train is selected in the text boxes at the top and the '+' button is green, you should be fine.
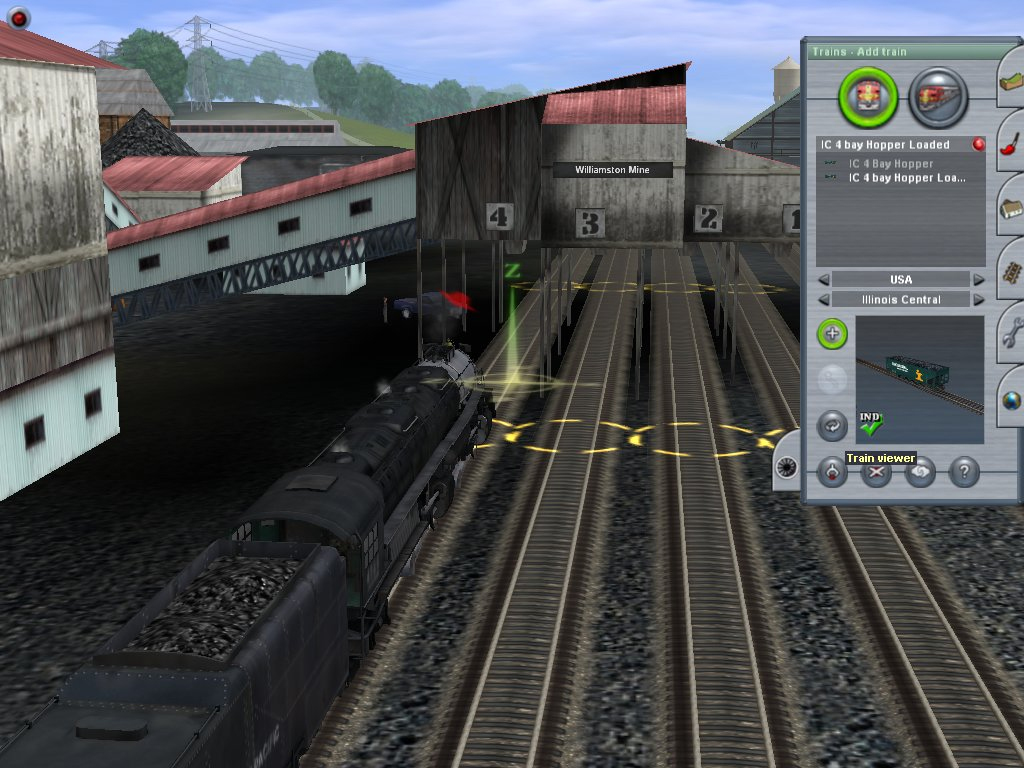
With the train selected, click the spot on the track where you would like the train to be and the train will appear on the track. Then select the Big Boy tender in your trains list and click where the tender should be. You have just placed the locomotive on the tracks.
Find the 'Illinois Central Hopper Car Loaded' and place it behind the tender. This takes some skill; you need to move away from the locomotive gradually as you place each car on the tracks.
As you place the cars behind the locomotive, notice that each end has a colored arrow next to it. If cars are fitted correctly on the train, you see one arrow at each end. If cars are not coupled correctly, an additional set of arrows will appear between uncoupled cars.
You may also notice an 'Ind' displayed in the view window, right next to a green check mark. This arrow is to show that the car has been configured to work with industries in TRS 2004. You will learn more about this later. When you place a locomotive or car on the track, you can then rotate it on the track by using the rotate button, which is found to the left of the 'Ind' and green checkmark.
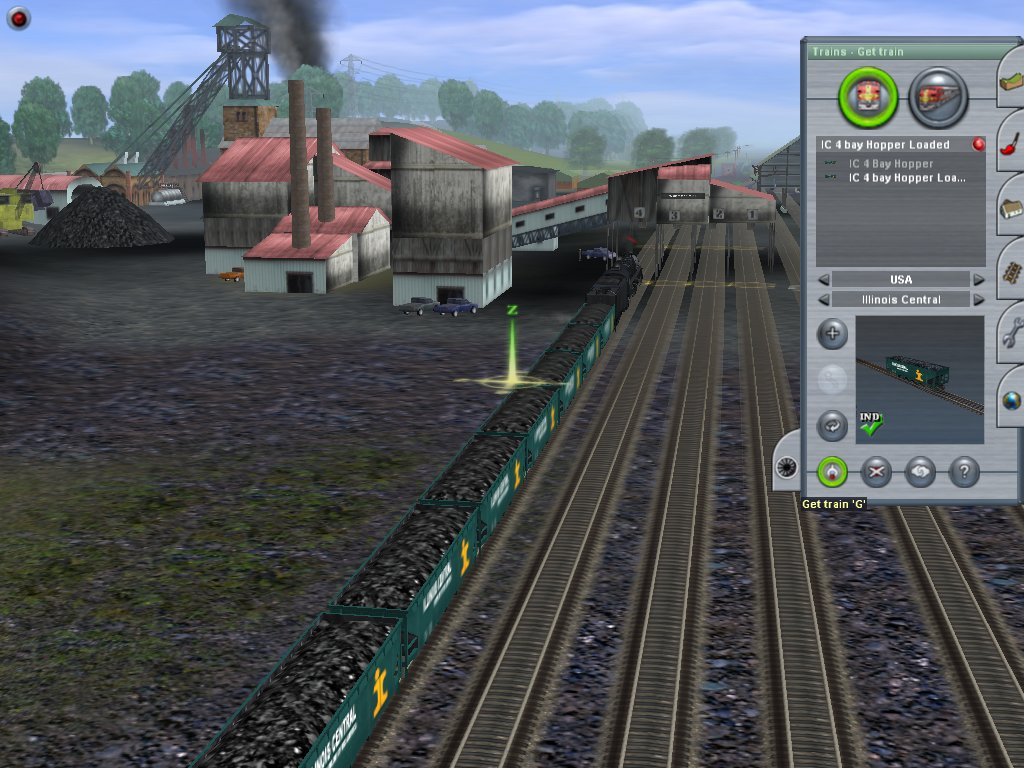
The 'Get' button is located just under the 'Rotate' button. This provides a very handy shortcut for 'getting' rolling stock that has already been placed on the tracks. Click the 'Get' button, and then select a piece of rolling stock. This will load that piece into the 'Train' menu, which will save you from having to pick each and every piece from the extensive list of options as you assemble your train.
When finished attaching cars to the consist, go to the 'Surveyor Menu,' and select the 'Save As' option. We named our session 'Test', but you can name yours after your dog if you want. We don't mind.
Driving and Dispatching
TRS 2004 allows you to assign tasks to your trains and therefore give them a job to do. When you placed your train in 'Surveyor' and saved it, TRS 2004 assigned a driver to this train to take care of it when you are not at the controls. TRS 2004 assigns drivers for up to seven trains. I often enjoy setting up eight trains, seven with jobs and the train which I drive myself.
Setting up and assigning a number of consists makes the game interesting and fun, although if you're running a complex route with lots of industry things can get pretty complex.
Starting a Session

- TRS 2004 placed our saved session under 'Michigan Lakes.'
- Select the 'main menu' button in order to leave the 'Surveyor.'
- Launch 'Driver' from main menu.
In driver mode, you're presented with the same menus as the 'Surveyor.' Routes are to the left of the line, and sessions to the right. Select our session, which we named 'Test,' and which you may have named it after your dog. You'll find it on the 'Michigan Lakes' route. Click the 'Load' button at the bottom of the menu.
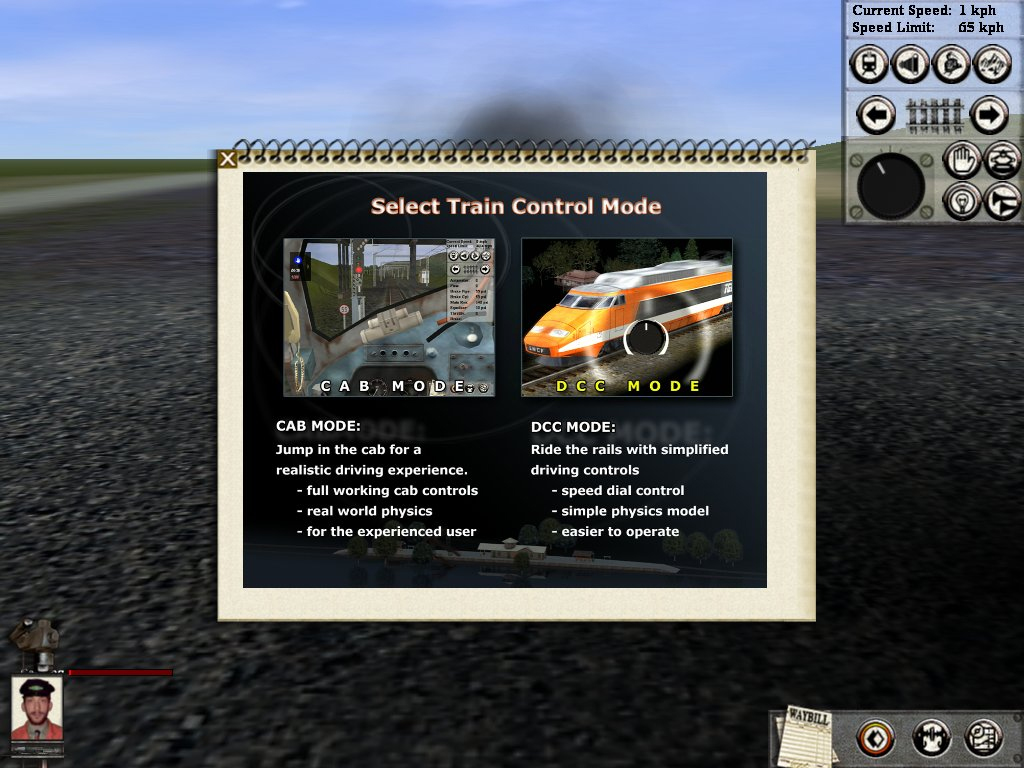
When the game launches the session, it will ask you to select which train control mode you wish to use for the route that you are about to operate. The choice you make will depend on how you want to operate.
If will be using RailDriver® Desktop Train Cab Controller to drive your train, please select the 'Cab Mode.' In that mode, the RailDriver® controls are able to work with the throttle, the brakes, the reverser, and most other controls your cab is capable of supporting.
If you are going to operate the route with multiple trains, like a dispatcher or model railroad session, then you may wish to select DCC mode, because it is much easier to jump into the driver's seat and move a train, or take the controls while the train is operating.
For the sake of simplicity, in this exercise, select DCC mode.

Once you've selected your mode, the game takes you to the train of your first driver. We are in the Big Boy, driving the train we assembled in 'Surveyor.' In the bottom left, you will see a picture of the driver. If you click on the icon just above the picture, it shows a list of all your drivers.
NOTE: While you weren't looking, we used the 'Get' feature, clicking a few times on the adjacent track to place a loose consist of hoppers there, just to give it a little atmosphere.
Getting Things Moving
There are two ways you can get the train moving in TRS 2004. You can either assign a driver to the train and give him a task to carry out, or you can drive the train yourself. Driving it yourself is simple. Select cab mode, release the brakes, throw the reverser on your RailDriver® into forward, throttle up, and then you're off.
But what do we do if you want to dispatch the train? Let's learn how to send this driver off to the power station to deliver the coal.
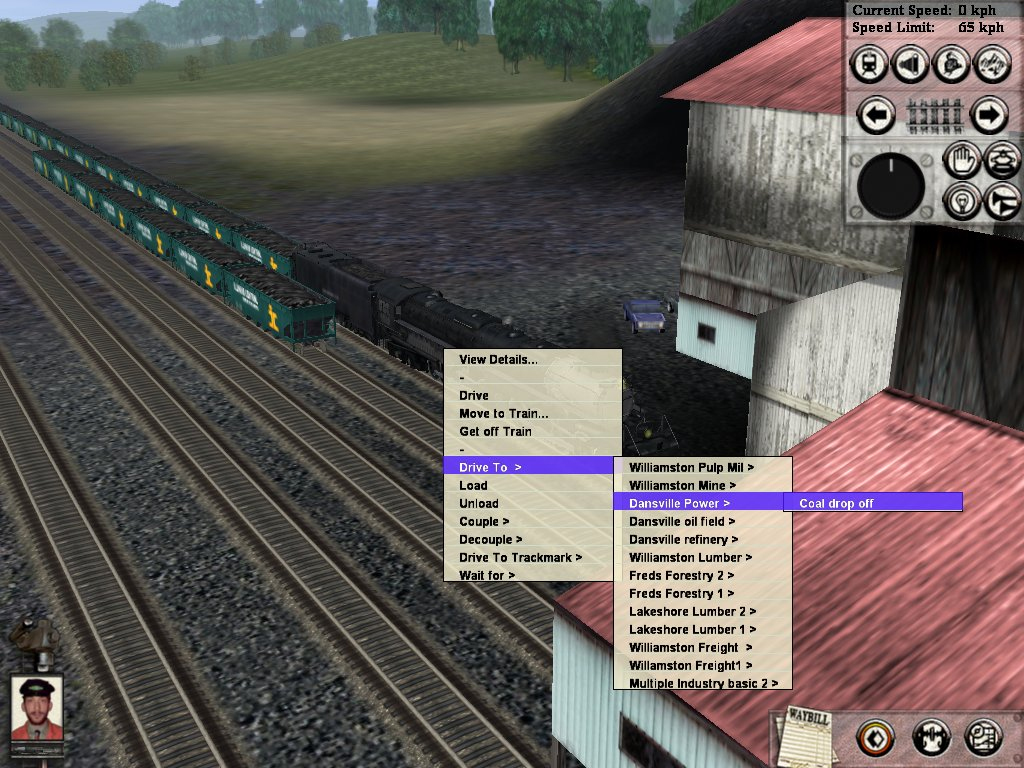
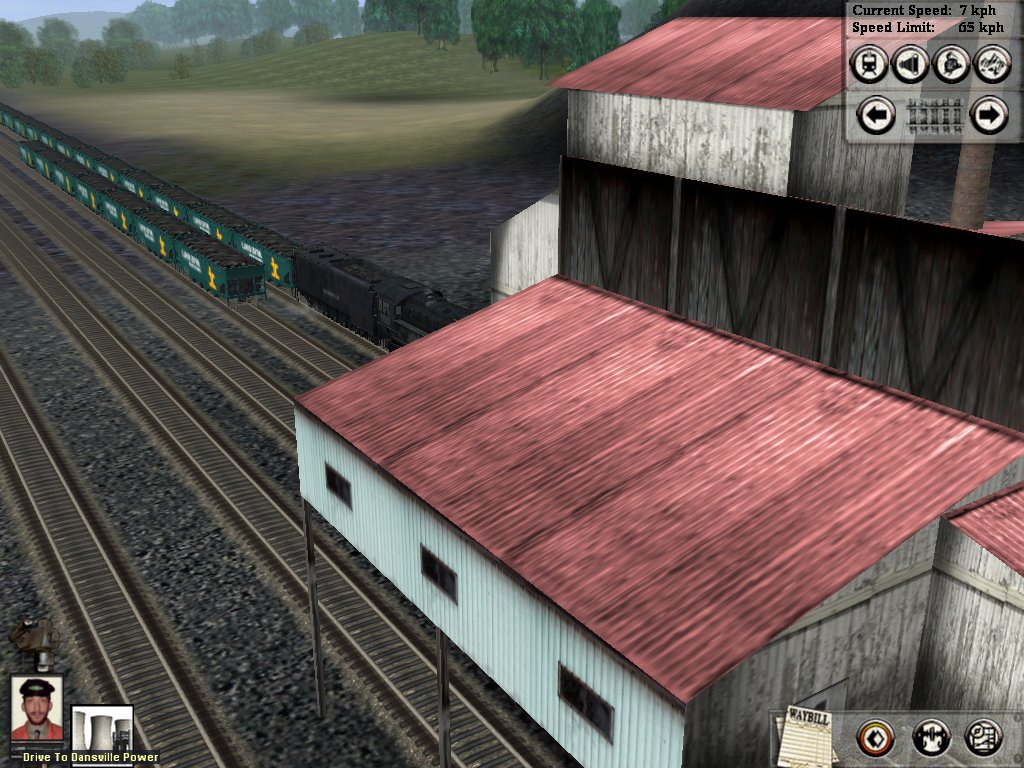
A right-click on the driver will bring up a menu of options. Selecting 'Drive To' will open a list of potential destinations. Mousing over the list of destinations will bring up a list of tasks. Select 'Drive To > Dansville Power > Coal drop off.'
When you select the task, the driver will acknowledge his orders with a 'Roger' and an icon will appear next to his picture.
Right-click the driver again and select 'Unload.' Another icon will appear to indicate that you've assigned this task. You can create an entire schedule for the driver in this manner and edit or delete tasks at will.
NOTE: Holding down the 'Ctrl' key while clicking on a task will delete it. This is handy for making quick adjustments to the task list.
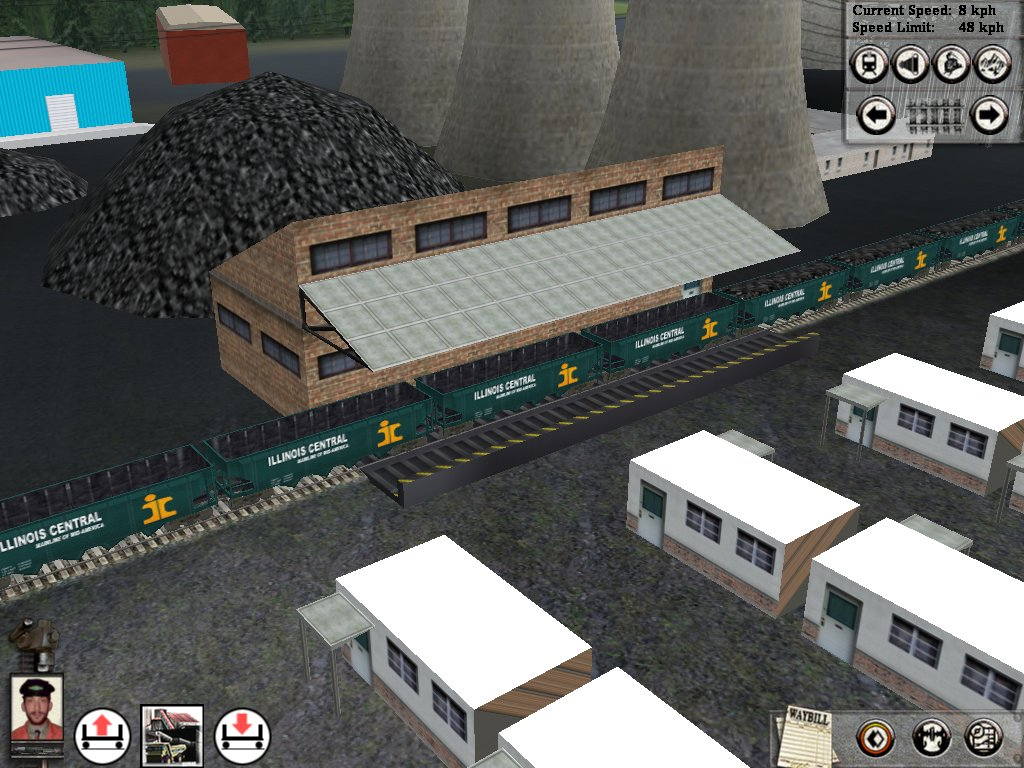
After arriving at the power station, thesef icons show the rest of the tasks we assigned to this driver while your back was turned: 'Unload,' 'Drive To Coal Mine,' and 'Load.' As dispatcher, you can also make a repeating string of tasks. This loop would keep a steady supply of coal going to the power station and keep the electricity running while you turn your attention to another area of the simulation.
End of the Line
We hope you found this tutorial informative. Our Michigan Lakes route for TRS 2004 is available on this site for you to download.
— Tutorial Written by Tim Court